 This is a big-old-heap-o-lumber. It was delivered this morning without mishap (although I did later drop a heavy part of the saw table on my foot) and I was so overwhelmed I had to go for a walk. After a little fresh air, a long time at the playground, and a little lunch, I was ready to tackle the job. First order of business: gather the assistants.
 Assistant #1 is kind of a sucker for safety gear. He flatly refused to work without his eye protection, although pants, shoes and under garments appear to have been optional.
 Assistant #2 was an enthusiastic helper, although I'm not sure he really liked the circular saw. His favorite part may have been climbing up on the car so we could get high enough to take "site approval" pictures to email to Daddy. We had some location issues, so we got to do this three times and it never got old.
Amazingly, the spot we chose for The Shed is one of the few almost-perfectly-flat spots in the yard. So far so good. On to some measuring and cutting. Measuring is easy. I have been a quilter for a while now and accuracy down to 1/16 of an inch generally does not freak me out (although fabric clearly allows for a bit more of a fudge factor than wood does). It also turns out that the circular saw is kind of like a giant demon rotary cutter on steroids and we got on surprisingly well together. I made exceedingly clever use of a clamp, a speed square, and a red builder's crayon (though really I got the idea from my shed building book) and all my cuts came out straight and accurate and so I really thought it would be a breeze from there.
And then I ran smack into my nemesis: The Hammer. The Hammer is spiffy and new and was one of my look-how-much-I-know purchases at the beginning of the week. It is a marvelous shiny tool with a comfy fiberglass handle and with one look at it in the store I was totally unable to remember how much I stink at hammering. Add to that that I am using spiral nails and working with pressure treated 2x6 (which feels very dense and doesn't take kindly to being hammered at) and you can just figure that I am screwed. The biggest problem is that the nails are designed to go in and NOT come out, which means that if you stink at hammering and don't always (i.e., almost never) hit the nail squarely and tend to bend and mutilate them, there is still no option but forward. I tried using some of the same language that I learned from the nice gentlemen who framed our house, but it shocked the dog and didn't make the hammering any easier. I had no choice but to resort to the drill. Pilot holes were created, and once the wood knew I was this serious, things went better.
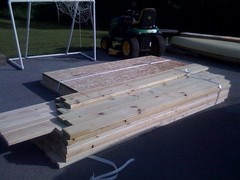
At the end of the day, this is what I have to show for my efforts. It may not look like much progress to someone who actually has some carpentry skills, but I am very pleased with it and I think I will come back tomorrow (or the next day) and add some more stuff to it.

No comments:
Post a Comment